Team Deathmatch in PUBG Mobile is all about speed, accuracy, and survival. Unlike classic battle royale, TDM throws you into instant respawn chaos where every second counts. That’s why choosing the right control layout – a set of button placements and sensitivities saved as a control code – can make or break your performance. I’ve scoured pro player setups and community favorites to bring you 10 PUBG Mobile control codes specifically optimized for TDM. Whether you’re a claw warrior, a gyro god, or just looking to tighten your hip-fire, there’s a layout here for you. Copy these codes, paste them into your settings, and watch your K/D climb.
1. The Classic 3-Finger Claw for TDM
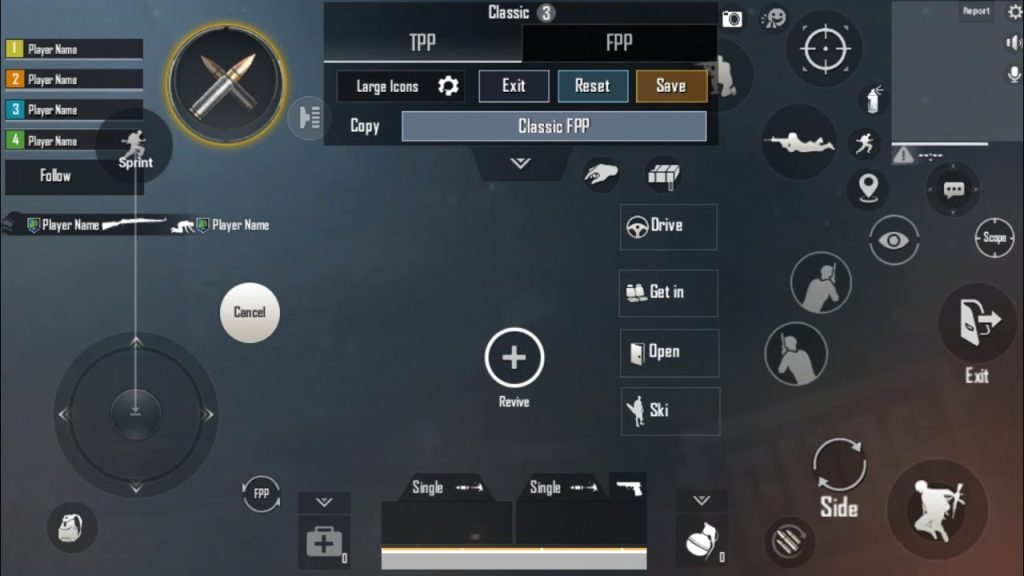
The 3-finger claw is the foundation of mobile competitive play. In TDM, it gives you the ability to aim, shoot, and peek without lifting your thumbs. The layout places the fire button in the top left corner, scope on the top right, and leaves your thumbs free for movement and crouch/jump. This setup excels in medium-range fights where you need to stay mobile. Many pros swear by this because it balances speed and control. If you’re new to claw, check out our beginner-friendly control codes guide for a step-by-step. For TDM, the 3-finger claw is your first stop.
2. 4-Finger Claw – Maximum Control
Taking the claw game up a notch, the 4-finger layout uses index fingers for fire and scope, and middle fingers for prone and crouch. In TDM, where you’re constantly sliding, jumping, and dropping shots, having dedicated buttons for each action keeps your thumbs on movement and aim. This layout is a beast for aggressive playstyles – you can jiggle peek, drop shot, and still maintain laser accuracy. Pair it with a 5 finger claw setup for even more buttons if your device supports it. For TDM, the 4-finger claw is a gold standard.
3. Gyro-Assisted Hip-Fire Layout
Gyroscope users know the power of tilting to aim. In TDM, hip-fire is king because you’re often face-to-face with enemies. A gyro-assisted hip-fire layout keeps the fire button close to your thumb while using gyro for fine adjustments. This code sets gyro sensitivity high for hip-fire and lower for ADS (aim down sights). It’s perfect for run-and-gun SMG or shotgun users. The result? Faster target acquisition and less thumb strain. If you want laser-like spray, pair this with an accurate spray layout for maximum consistency.
4. Quick Scope Layout for DMR/SR Fans
If you love using DMRs or snipers in TDM, a quick scope layout is essential. This code maps the fire button to the same finger as the scope button (via a tap-hold mechanic) or places them close together to reduce reaction time. It also adjusts the release timing so you can scope, fire, and unscope in one fluid motion. The layout sacrifices some movement for precision, but in TDM’s long sightlines on maps like Library or Warehouse, it pays off. For more on fine-tuning, our control codes tutorial breaks down the technical details.
5. Peek & Shoot Optimized Layout
Peeking is a core mechanic in TDM – using cover to expose only part of your hitbox. A peek-optimized layout moves the lean buttons to easy-to-reach spots (often on the top edge) and pairs them with a separate fire button. This code also increases the peek button size to prevent mis-taps. You’ll find yourself winning more corner battles because you can lean, shoot, and retreat in a split second. For squad-based TDM, combine this with solo vs squad layouts to handle multiple enemies.
6. Shotgun Rush Layout
Shotguns in TDM are devastating at close range, but they require a different control philosophy. This layout puts the fire button in the lower center for easy thumb access while using the left index to jump/slide. The design promotes constant movement – slide into a room, jump over cover, and blast before the enemy can react. Gyro is set to low to avoid over-correcting. It’s a high-risk, high-reward setup that will make you a TDM menace.
7. DMR Spam Layout for Consistent Damage
DMRs like the Mini-14 or SLR reward rapid, accurate taps. This layout optimizes the fire button for rapid tapping – making it slightly larger and with a higher fire rate threshold. It also maps the scope button to a different finger so you can stay scoped while spamming. The result is a stable, high-damage output at medium to long range. For spray enthusiasts, this pairs well with an accurate spray layout for mixed ranges.
8. Vehicle Combat Layout (for TDM with Vehicles)
Some TDM modes include vehicles. A vehicle-combat layout moves the drive/shoot buttons to the thumbs and adds a separate button for handbrake turns. It also adjusts the camera sensitivity for faster follow-ups. This code is niche but invaluable when you’re chasing or escaping. If you play a lot of vehicle-heavy TDM rotations, save this code. Remember to revert after the match – our control codes after reinstalling guide can help you manage multiple layouts.
9. Close Quarter Combat (CQC) Layout
CQC layouts prioritize hip-fire, melee, and quick ADS. This code places the aim and fire buttons in the lower corners, with melee and grenades on the edges. It also uses high gyro sensitivity for snap aiming. In tight maps like Ruins, this layout gives you the split-second advantage. The key is to keep your thumbs free for movement while your fingers handle actions – a classic claw variant.
10. All-Rounder TDM Layout for Flex Players
Can’t decide on a single playstyle? The all-rounder layout balances claw, gyro, and button size. It works for any weapon – from AR to sniper. The layout uses a 4-finger base with gyro on high for both hip and ADS, and keeps all utility buttons accessible. This code is a great starting point if you’re experimenting. Tweak it as you go, and for inspiration, check out our other layout guides like the 5 finger claw setup for even more advanced configurations.
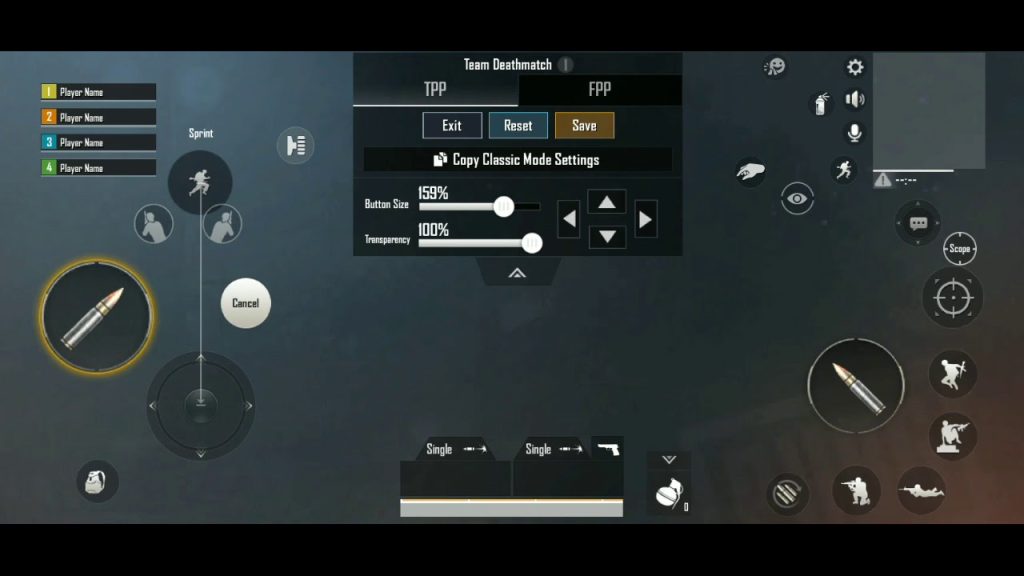
There you have it – 10 PUBG Mobile control codes tailored for TDM that cover every playstyle from rush to sniper. The beauty of these codes is that you can copy-paste them directly into your settings, no need to manually rearrange buttons. Start with the one that matches your current style, then branch out as you improve. Remember, the best layout is the one you stick with – so practice in the training grounds before taking it live. Happy fragging!