You’ve got the drop, the cover, and the element of surprise—but somehow the enemy still wins the aim duel. Sound familiar? The difference often isn’t skill but a handful of control codes and camera settings that control how your crosshair moves. Pro players obsess over these because they turn a jittery scope-in into a silky-smooth lock-on. Here are seven tweaks that cut recoil, speed up target acquisition, and make every shot count. I pulled them from tournament layouts and community favorites, so you can spend less time fiddling and more time clutching.
1. The Camera Sensitivity Sweet Spot
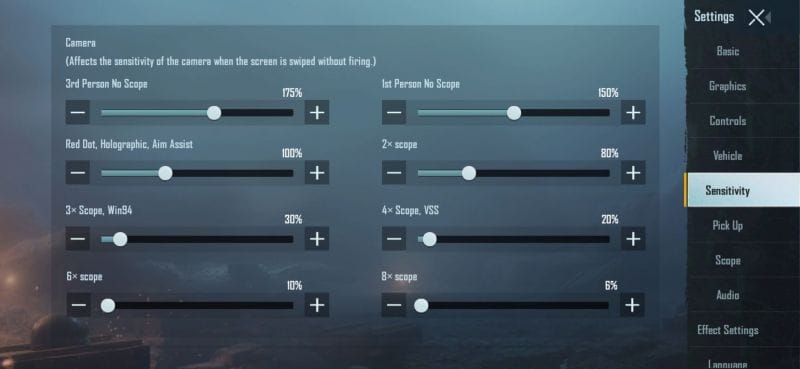
Start with the camera sensitivity (the one that controls how fast your view moves when you swipe without aiming). Too high and you’ll overshoot targets; too low and you’ll be a turtle turning around. For high-end phones that can handle 60 fps, I recommend 100%—it gives you instant 180 flicks. On mid-range devices, drop to 80% to avoid frame drops that make aiming stutter. The real trick is pairing this with your ADS sensitivity later. Many players ignore this base setting and wonder why they can’t track a running enemy. For a deeper dive, check out our post on the best sensitivity for headshots.
2. Gyroscope Settings for Micro-Adjustments
Gyro aiming is the secret weapon of mobile pros. It lets you tilt your phone to make tiny aim corrections that thumbs can’t replicate. Set your gyro scope sensitivity to around 30-50% for 4x and above—this prevents accidental over-correction. For red dots, go higher (60-70%) to snap onto heads quickly. Enable gyro only when scoped, not for hipfire, unless you have a steady hand. If you’re new to gyro, start with the layouts from our gyro aiming guide—they include control codes that map scope buttons to minimise accidental tilts.
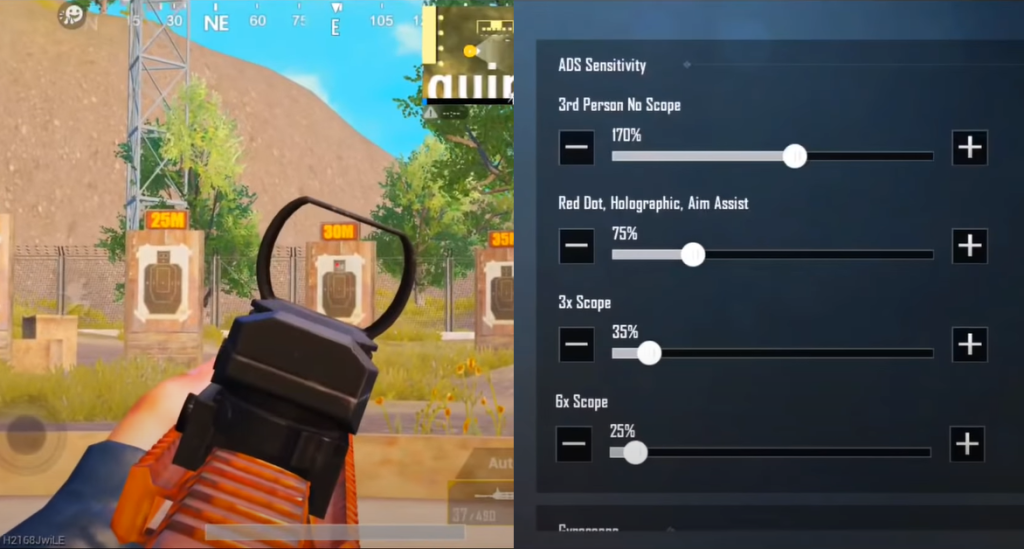
3. ADS Sensitivity – One Size Doesn’t Fit All
A common mistake is using the same sensitivity for every scope. You need separate values because a 6x zoom amplifies every little twitch. My tested baseline: red dot – 55%, 2x – 45%, 3x/4x – 35%, 6x (zoom-out to 3x) – 30%, 8x – 15%. The key is to pick a value where you can keep the crosshair on a moving target without fighting the reticle. Pros often run slightly lower ADS sensitivities for stability. For layouts that incorporate these numbers, browse our esports pubg control codes—they come pre-tuned for competitive play.
4. Turn Off Camera Shake – No Exceptions
Camera shake is an atmospheric toggle that ruins your aim under fire. It makes your view bounce when you get hit, and during a firefight that jitter can cause you to miss critical shots. Go to Settings → Graphics → and set Camera Shake to Off. This is especially important for mid-range fights where tracking matters. Once it’s off, you’ll notice your crosshair stays on target even when you take damage. Pair this with the control codes for prone control that keep your view stable while dropping.
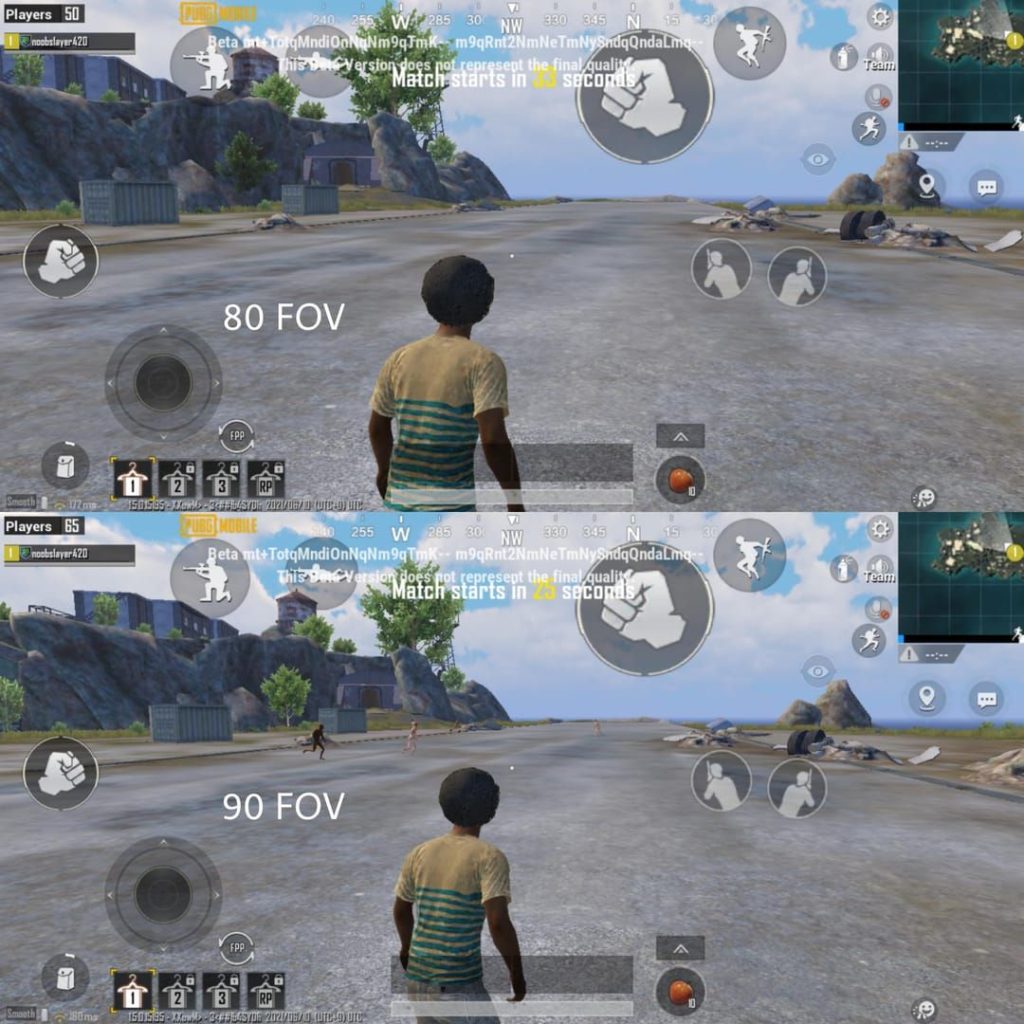
5. Field of View (FOV) Slider – Find Your Comfort Zone
FOV determines how much of the game world fits on your screen. A higher FOV (max 90°) gives you wider peripheral vision, so you’ll spot enemies at the edges faster. The trade-off is that enemies appear smaller, making long-range shooting harder. Lower FOV (75-80) blows up targets but narrows your view, leaving you open to flanks. I suggest starting at 85 and adjusting based on your playstyle: aggressive rushers can go up to 90, while snipers should drop to 80. Remember to re-calibrate your sensitivities after changing FOV because the perceived sensitivity shifts.
6. The Magic of a Good Control Code for Scope-in Speed
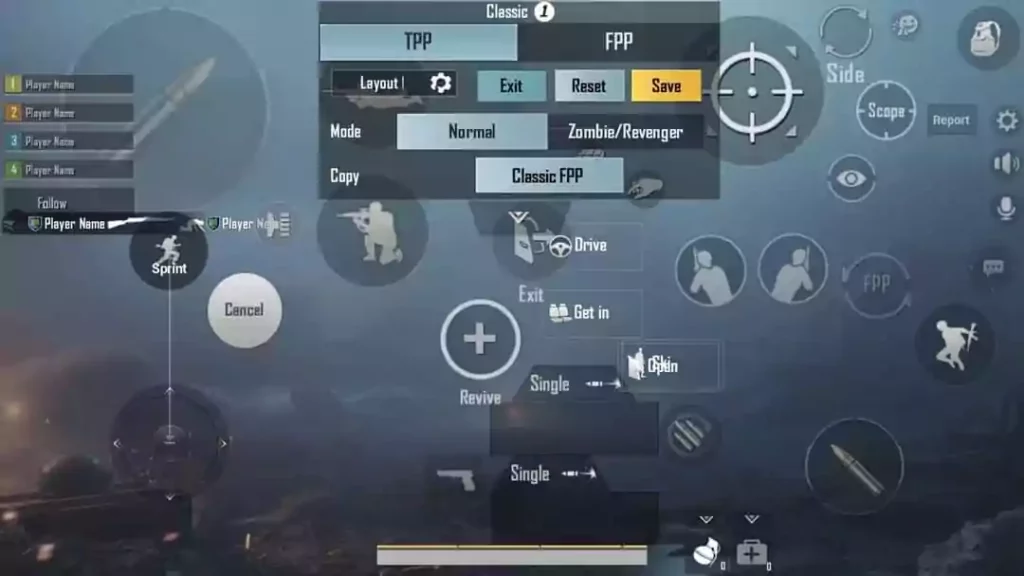
How fast you can scope in often decides the fight. Control codes let you remap the scope button to a more accessible finger. For example, a classic 4 finger setup moves the scope button to the top left, the fire button to top right, and uses bottom thumbs for movement. This reduces split-second delays. Many players also separate “aim” (hipfire) from “scope” (ADS) by mapping them to different fingers. Import a known code from our 4 finger setup collection—it will already have the scope button placed for instant access.
7. Import a Pro Camera Template and Iterate
You don’t have to build everything from scratch. The fastest way to improve is to import a control code from a top player and then tweak one or two settings. Use the in-game import feature (Settings → Controls → Layout → Import Layout) with a code from our collection. For instance, many PUBG Mobile control codes for ranked events come with camera sensitivities dialed to pro standards. After importing, test in the training ground: if tracking feels off, adjust the ADS sensitivity by 5% increments. Small changes compound into big wins.
These seven adjustments cover the core of aiming in PUBG Mobile. Start with camera shake off and FOV at 85, then dial in your sensitivities. Import a code that matches your grip style (2-finger, 4-finger, claw) and refine from there. Your aim won’t transform overnight, but within a few matches you’ll notice fewer missed shots and more chicken dinners.