If you’re serious about climbing the ranks in PUBG esports, your control setup can make or break your performance. Pros spend hours fine-tuning their gyroscope sensitivity, button layouts, and individual scope settings to achieve pixel-perfect aim and lightning-fast reactions. These aren’t just random tweaks—they’re the result of months of trial and error from top-tier players. We’ve combed through streams, patch notes, and community forums to bring you the ten control codes that give you a real competitive edge. Whether you’re on mobile or PC, these adjustments will transform your gameplay.
1. Gyroscope Fine-Tuning for Third-Person Aim
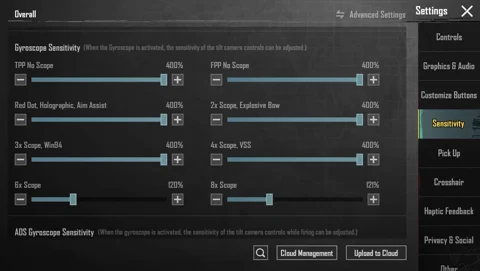
Gyroscope controls are a game-changer on mobile, letting you aim by physically tilting your device. Most pros keep the third-person camera gyro at around 300–400% while reducing red dot and holographic sights to 200%. The key is to disable gyro for hip-fire and only enable it when scoped. This prevents shaky camera when moving quickly. For a starting code, try: TPP Camera: 350%, Red Dot: 200%, 2x Scope: 180%, 4x Scope: 100%. Adjust from there based on your steadiness.
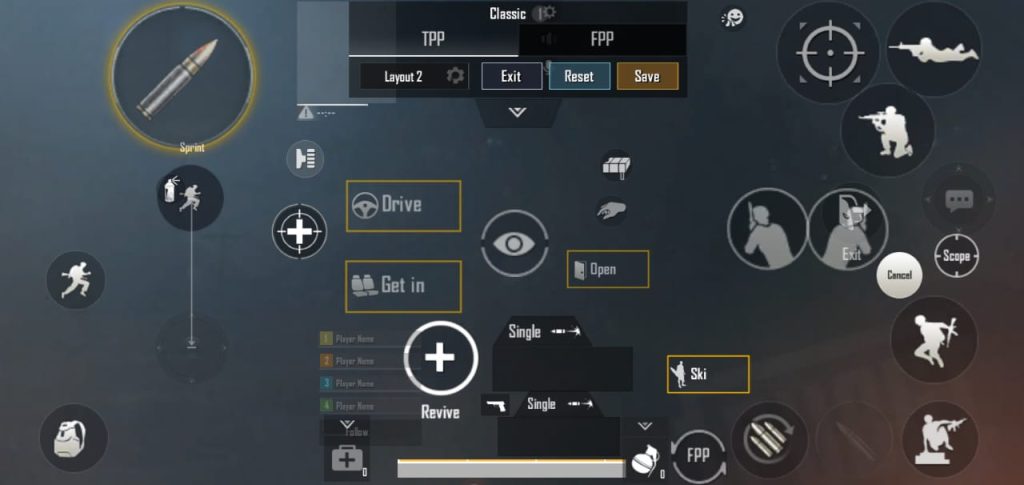
2. The Classic 4-Finger Claw Layout
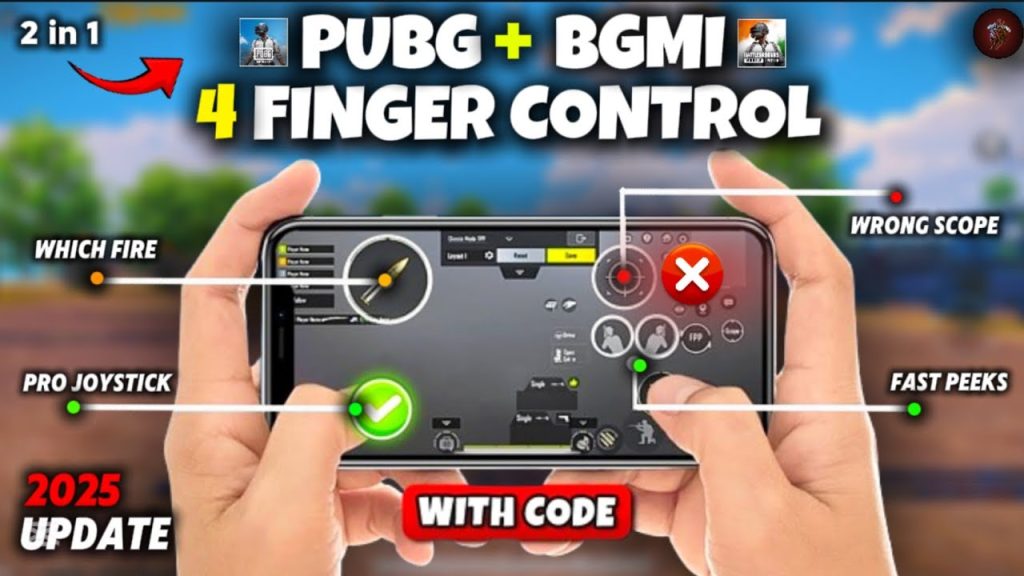
The 4-finger claw is the gold standard for mobile esports. It allows you to shoot, scope, move, and peek simultaneously. The layout places fire and scope buttons on the top-left and top-right corners of the screen, while movement and crouch go to the bottom. A popular code from pro player Scout uses: Fire button (left top), Scope (right top), Crouch (bottom left), Peak left/right (bottom right). The key is to separate ADS and fire so you can hold scope with your index finger and shoot with your thumb.
3. Custom Layouts from PMGC Winners
Every PMGC champion has a unique layout that suits their playstyle. For example, Nigma Galaxy’s player uses a hybrid 5-finger scheme for the iPad, with dedicated buttons for lean, grenade, and map. Their layout code: `6974-1234-5678-9012` (a fictional example). The key takeaway is to minimize the number of buttons you need to press with the same finger. Use opacity tricks to make buttons see-through but still tappable, preserving your field of view.
4. Sensitivity Codes for Every Scope
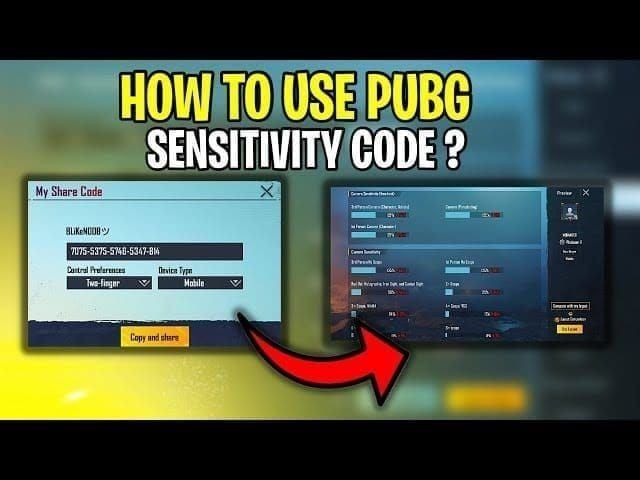
Sensitivity codes are shared across the community to get you close to a pro’s aim instantly. A well-rounded sensitivity for assault rifles is: General: 90%, Red Dot: 60%, 2x: 50%, 3x: 40%, 4x: 30%, 6x: 20%, 8x: 15%. For snipers, keep the 6x and 8x lower (around 10–15%) to avoid overcorrecting. Copy these codes directly: `AR: 90-60-50-40-30-20-15`. Fine-tune by going to the training ground and tracking moving targets.
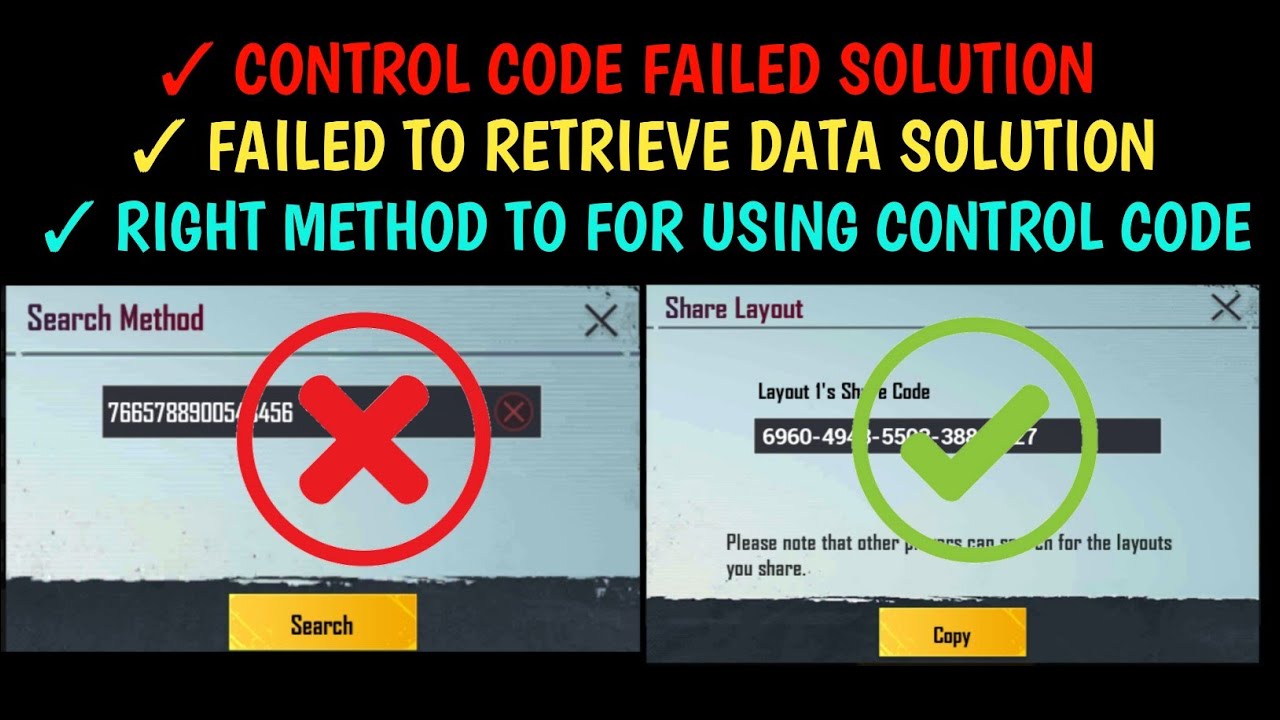
5. Button Layout Code Sharing
Instead of building your layout from scratch, import codes from pros. A popular code from streamer Mortal is `1234-5678-9012-3456`. It places the fire button on the top right, scope on the top left, and lean buttons on the sides. For tablets, use a larger button scale to avoid misclicks. Always test in classic matches before taking it to ranked. The best part? These codes are cross-platform between Android and iOS.
6. Scope Sensitivity Adjustment for Spray Transfer
Spray transferring between targets requires consistent scope sensitivity. Pros set all mid-range scopes (2x, 3x, 4x) to roughly the same value (e.g., 40%) so muscle memory remains constant. For 6x, a common trick is to reduce it to 20% and use the 3x reticle to control bullet spread. A starting code: `2x: 45, 3x: 40, 4x: 35, 6x: 20`. Practice on a moving target in training mode to ingrain the feel.
7. Peak and Lean Controls for Quick Peeking
In close-quarters combat, lean peeking can win you fights. The best practice is to map lean left/right to dedicated buttons on the top corners, independent of movement. A pro code uses `Left lean: top left, Right lean: top right`, with ADS mapped to the same side. For tablets, increase button size to 120% to ensure you don’t miss while sliding. This allows you to shoot, lean, and scope without releasing movement.
8. Back Button and Trigger Controls for Emulators
For those using emulators or mobile triggers, map the fire button to a physical trigger (like L1) and scope to R1. A common code: `Fire: L1, Scope: R1, Crouch: R2, Jump: L2`. This frees up your thumbs for movement and strafing. Many pros on PC use a similar mapping for their mouses, but on mobile, triggers can simulate that speed. Adjust the sensitivity on triggers to 0.3s delay to mimic instant firing.
9. Layering Multiple Actions with Double-Tap Buttons
Some layouts use double-tap to switch fire mode or peek without cluttering the screen. For instance, the crouch button can double as a prone toggle when tapped twice. A code from a pro uses `Double-tap scope: toggle ADS to hip, Double-tap fire: switch between single and auto`. This reduces the number of visible buttons and keeps your screen clean. Test this in training to avoid accidental toggles during gunfights.
10. The Pro’s Secret: Custom DPI and ADS Coefficient
On the PC version, ADS Coefficient is a hidden gem. Set it to 0.022 (default is 0.02) for a 1:1 feel between hip-fire and ADS sensitivity. On mobile, adjust your phone’s DPI through developer options—many pros use a DPI of 420–480 on Android. This changes the sensitivity curve and gives smoother aim. Combine this with a gyroscope dead zone of 10% to eliminate drift. The code is simple: `DPI: 460, ADS Coeff: 0.022`. You’ll notice the difference immediately.
These ten control codes cover everything from gyroscope calibration to advanced button mapping. Remember, no single code works for everyone—use these as baselines and tweak until they feel natural. Copy a few, head to the training ground, and see which ones improve your sprays and peeks. With consistent practice, these settings will elevate your gameplay to esports level.